
There is one winter look that shows up every year on cold-weather Pinterest boards, in street-style photos, and on every snowy weekend walk: two loose braids, a chunky knitted beanie pulled low, a big fluffy scarf, and a few snowflakes caught in the hair. It is cosy, effortless, and flattering on almost everyone, and it solves the biggest winter hair problem of all: how to wear a hat without ending up with flat, static, hat-hair underneath.
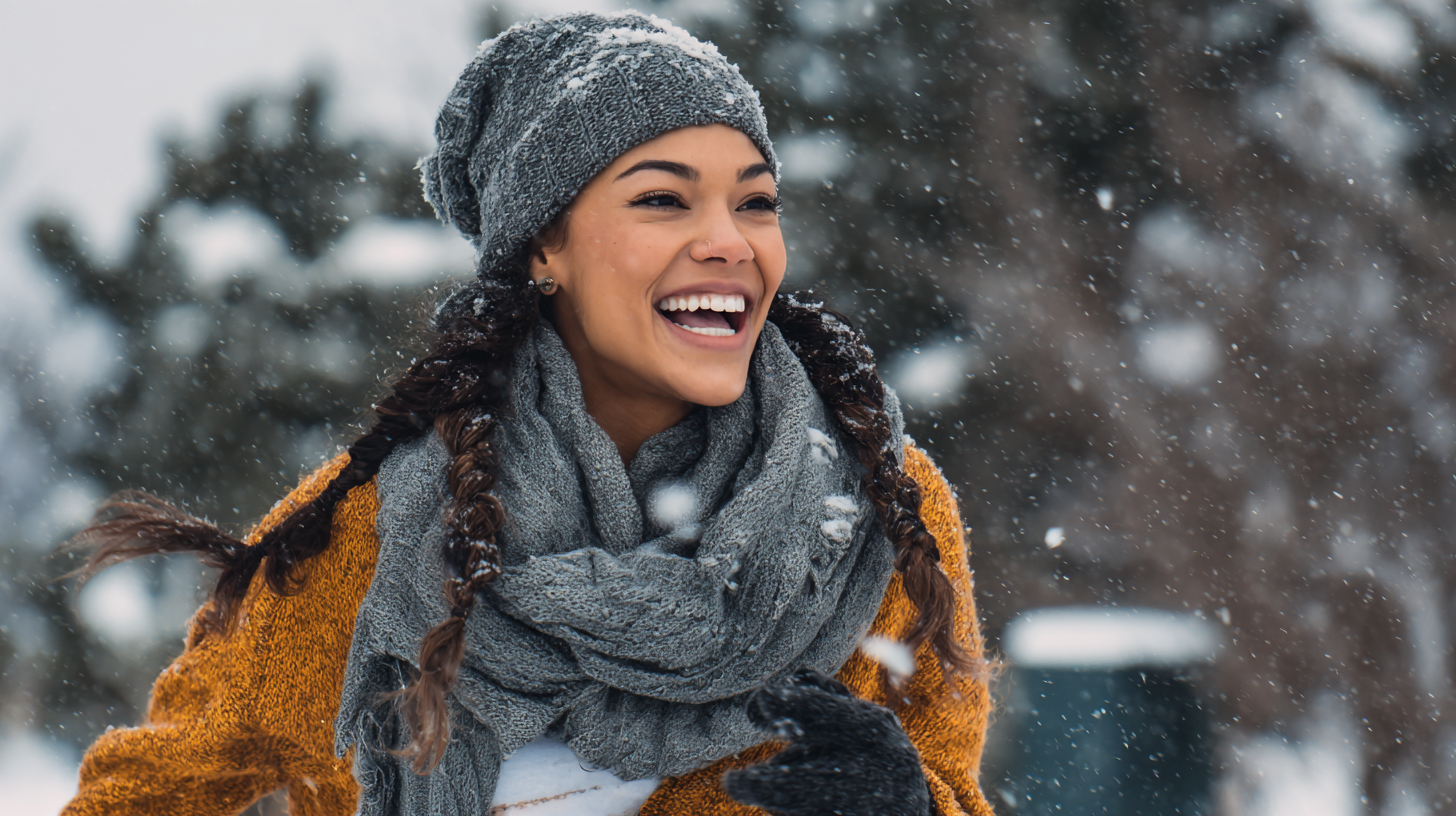
Here is how to put the whole look together, from the braids to the beanie to keeping it looking good after hours in the cold.
Why Two Braids Are the Perfect Hat Hairstyle
A beanie flattens whatever is under it. Loose hair goes limp, a ponytail leaves a bump, and a bun will not fit at all. Two braids sit below the hat line, so nothing gets crushed. When you take the beanie off indoors, the braids are still intact and the top of your head needs only a quick fluff with your fingers.
Braids also protect your hair from winter damage. Cold, dry air and wool scarves cause friction and breakage, especially at the ends. Keeping the lengths braided reduces tangling, cuts down on static, and keeps the ends tucked away from the scarf.
Step 1: Prep the Hair
- Start with dry hair, ideally a day or two after washing so it has some grip.
- Work a small amount of leave-in conditioner or hair oil through the mid-lengths and ends. This keeps the braids soft and fights the dryness that cold air causes.
- If your hair is very fine, add a little texturising spray at the roots so the braids hold their shape.
Step 2: Create the Two Braids
- Part the hair down the centre from forehead to nape. A slightly imperfect part suits this look; it is meant to be relaxed, not sharp.
- Split the hair into two sections and clip one side out of the way.
- Braid each side with a simple three-strand braid starting just below the ear. Starting low is important: this leaves the hair above the ears smooth so the beanie sits flat.
- Secure each braid with a clear elastic, leaving a little tail at the bottom.
- Gently pull the outer loops of each braid apart to make them fuller and softer.
Want more texture? Use a fishtail braid instead of a three-strand braid. It looks more intricate and pairs beautifully with the chunky knit of the beanie and scarf.
For curly or natural hair, braid on lightly dampened, moisturised hair for a smoother finish, and consider two chunky Dutch braids, which sit on top of the hair and show through more dramatically under the scarf.
Step 3: The Beanie
The beanie is doing a lot of work in this look, so choose it carefully.
- Go chunky. A thick cable-knit or ribbed beanie gives the look its cosy proportions. Thin, tight beanies read as sporty rather than snug.
- Pull it low, so it sits just above the eyebrows and covers the ears. This is what makes the braids look like they are peeking out from under the hat.
- Pick a colour that contrasts with your hair. Cream, oatmeal, and soft grey are classic with dark hair; deep burgundy, forest green, and rust look stunning on blondes and lighter brunettes.
- Satin-lined beanies are worth it if you have curly, coily, or colour-treated hair. The lining reduces friction and frizz.
Step 4: The Fluffy Scarf
A big, soft scarf is what turns the braids and beanie from “practical” into a full winter outfit.
- Choose a long, oversized scarf in faux fur, mohair, teddy fleece, or a thick chunky knit.
- Wrap it once around the neck and let the ends hang over the braids, or wrap it twice for a cocooned look that frames the face.
- Pull the braids forward so they sit on top of the scarf, not buried underneath it. This keeps the braids visible and keeps the scarf from tugging them loose.
- Match the scarf to the beanie for a tonal, polished look, or mix textures (a smooth knit beanie with a fluffy scarf) for more interest.
Step 5: Snowflakes in the Hair (and How to Deal With Them)
Snowflakes resting on dark braids is the detail that makes this look so photogenic. For a few minutes outside, let it happen. Just keep two things in mind:
- Melted snow is water. Once you come inside, blot the braids gently with a towel rather than rubbing, and let them air dry. Do not sleep on wet braids.
- Protect the ends with a little oil before going out. The ends are where moisture damage shows first.
If you are taking photos, catch the snowflakes while they are fresh, keep the beanie low and the scarf high, and turn slightly away from the wind so the braids fall forward.
Styling Variations
- Two braids into a low bun: cross the braids at the nape and pin them into a bun for a neater version that works for the office.
- Braids with face-framing pieces: pull out two small sections at the temples and curl them lightly for a softer finish when the beanie comes off.
- Add ribbon: weave a thin velvet ribbon through one or both braids for a festive touch in December.
- Half-up version: braid only the lower half and leave the top loose if you want more volume once you are indoors.
Keeping the Look Fresh All Day
- Carry a tiny bottle of hair oil or a travel-size anti-frizz serum to smooth the braids after taking off the beanie.
- A few spritzes of dry shampoo at the crown revive the roots after hours under a hat.
- If the braids start to loosen, do not re-braid in public. Just tug the loops a little wider so the looser texture looks intentional.
Final Thoughts
Two braids, a chunky beanie, a fluffy scarf, and a few snowflakes: it is the easiest winter look there is, and it photographs like you planned it for hours. Prep the ends, braid low, pull the beanie down, let the scarf do the talking, and enjoy the snow.
Leave a Reply